

If you’re working on a commercial building, school, apartment complex, or any space where fire safety isn’t an afterthought, fire rated windows aren’t just a nice add-on—they’re a critical part of your fire protection system. As a fire rated window supplier, I’ve walked through dozens of installations with contractors, and let’s be real: messing up the process (even by a small gap or a quick seal) can completely kill the window’s fire rating. Today, I’m breaking down exactly how it goes, what to watch for, and why cutting corners here is never a good idea.

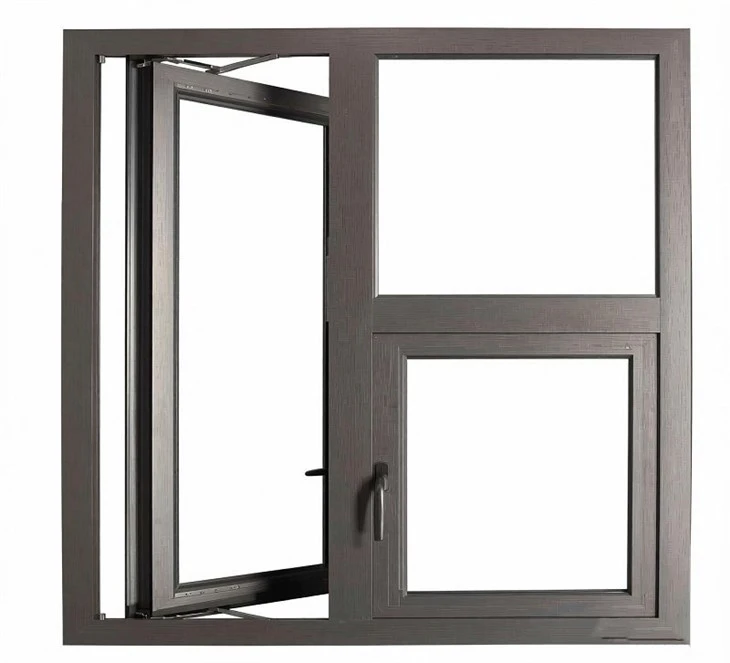
First, let’s get one thing straight: not all fire rated windows are the same. We make a bunch of styles for different needs—steel thermal insulating ones for high-performance commercial spaces, fixed fire resistant windows that don’t open (great for hallways or stairwells), even wooden fire resistant windows for projects that need a warmer, more traditional look. If you just search for a basic window, you’re gonna end up with something that won’t hold up if a fire breaks out, so start by picking the right type for your space. For example, areas that need both fire resistance and energy efficiency (like offices with big windows facing outside) usually work best with our Steel Thermal Insulating Fire Resistant Window, while small storage rooms might be covered by a simple Fire Resistant Window that’s easy to spec and install.
Now, let’s jump into the step-by-step process—this is the part where most contractors either nail it or mess it up. Let’s start way before you even touch the window itself.
Step 1: Measure Twice, Order Once (No, Really)
I can’t tell you how many times I’ve seen a contractor order a window that’s an inch too big or too small because they eyeballed the rough opening. The rough opening (that’s the hole in the wall where the window goes) needs to be exactly the size our windows are spec’d for—usually, it’s ½ inch wider and ½ inch taller than the window unit, just enough space to shim it in level without forcing it. If the opening is too tight, you can’t adjust it, and if it’s too big, you’ll have gaps that let smoke or fire seep through. Pro tip: bring a tape measure (not a smartphone camera—those are never accurate enough) and check three times: top, middle, bottom for width; left, middle, right for height. If you’re working on a retrofit, you might need to chisel out old framing a little to get the right size, but resist the urge to make a random big opening just to skip the work.
Step 2: Prep the Opening (Clean and Level)
Next, clear out the rough opening. Remove any old insulation, loose nails, or bits of drywall that might be sticking out—fire can catch on those, so you want the opening to be as clean as possible. Then, check if the framing is level and plumb. If it’s wobbly, you gotta fix that before installing the window. How? Use wood shims to prop up low spots, or trim high spots with a saw. If the framing is metal, you might need to add a small bracket to make sure it’s stable—if the window shifts after you put it in, the seals will break. This step might feel tedious, but it’s the foundation for the whole installation. Skip this, and your window could be tilted, leading to gaps later.
Step 3: Set the Window in Place
Now it’s time to pick up the window unit. Important: these aren’t regular windows—they’re heavier than standard vinyl or wood ones, so don’t try to move them alone. Grab a buddy, use a dolly if you need it, and lift it straight into the opening. Don’t tilt it or force it into place—you want it centered evenly. Once it’s sitting right, drive in a couple of temporary nails (one on each side, near the top) to hold it in place. Now, double-check the level again. If it’s off, adjust the shims under the bottom of the window. For steel fire resistant windows, this is extra important because their rigid frame can’t flex like a regular wooden window, so if it’s not level, the fire rating will be compromised.
Step 4: Shim and Secure (Don’t Over-Tighten)
Shims are your best friend here. Slide shims between the window’s frame and the rough opening, at every corner and every 16 inches along the sides (that’s standard stud spacing, so it supports the window evenly). Once the window is fully level and plumb, drive in the permanent screws. Wait—here’s the big mistake people make: over-tightening screws. These windows have a fire-resistant seal around the frame, and if you crank the screw too tight, you’ll crush that seal, leaving a gap. You want the screw tight enough to hold the window in place, but not so tight that the frame bends or the seal breaks. For most of our windows, 3-inch screws (for wood framing) or self-drilling screws (for metal framing) work, and we usually recommend driving them through the predrilled holes in the window frame—never drill your own holes, because that can damage the fire-resistant coating.
Step 5: Seal the Gap (The Most Critical Step)
This is where 90% of installation failures happen. The gap between the window frame and the rough opening isn’t just empty space—it’s a way for smoke and fire to spread. Regular caulk won’t work here; you need a fire-resistant sealant specifically rated for the type of window you’re using. We always tell contractors to use intumescent fire sealant—this stuff expands when exposed to heat, sealing up gaps that would otherwise let fire through. How much? Fill the entire gap evenly, tool it smooth so there are no air pockets, and make sure it’s applied all the way around the frame, top, bottom, and sides. Don’t skimp here—even a tiny ¼ inch gap at the bottom can let flames into the adjacent room within minutes. If you’re installing a fixed fire resistant window (which doesn’t have operable hardware), the seal is even more important because there’s no other way to block the opening.
Wait, a quick side note: don’t use spray foam insulation for this gap. Spray foam isn’t fire-resistant, and it will break down in a fire, leaving gaps. Stick to the intumescent sealant.
Step 6: Install the Sill and Trim (Finish Strong)
Now that the window is sealed, you can add the interior and exterior trim. For the interior, use non-combustible trim materials (like metal or cement board) if the window is in a high-risk area (like a kitchen or a stairwell). If it’s a lower-risk area, you can use wood trim, but make sure it’s not covering the fire-resistant seal—you should still be able to see the seal around the frame. Exterior trim should also be non-combustible, or if it’s wood, it needs to be fire-retardant treated. For the sill, slope it slightly outward (about ¼ inch per foot) to keep water out—water can damage the window’s frame, and if water seeps into the gaps, it can eat away at the fire-resistant coating over time.
Step 7: Test It (You Can’t Just Install and Walk Away)
This is the step that a lot of contractors skip, but it’s non-negotiable. Once the installation is done, you need to do a quick smoke test to make sure no gaps are leaking. Get a smoke pen or a small fog machine, run the smoke along the seal around the window frame, and check if smoke is seeping out (or in). If there’s a leak, you’ll see the smoke getting pulled into the gap—just go back and add more sealant there. Also, if the window is operable (not fixed), test the sash to make sure it opens and closes smoothly—if it’s sticking, that means the frame is twisted, which could mess up the seal when you close it in a fire.
Now, let’s talk about what makes our fire rated windows different, because a lot of suppliers cut corners here. Our Steel Fire Resistant Window, for example, has a 90-minute fire rating (and we have 3-hour options too) that’s tested to meet NFPA 80 standards—so it’ll hold up if a fire is raging outside. Our wooden ones are treated with a fire-retardant coating that doesn’t weaken the wood’s integrity, so they work for spaces where you want a warm, natural look without sacrificing safety.
But here’s the thing: even the best fire rated window won’t work if it’s installed wrong. I’ve seen a contractor install a window with a single shim on the left side, no sealant, and they wondered why it failed a fire test. Don’t be that guy. Take the time at each step—measure twice, level it, seal every gap, test it. It’s worth the extra 30 minutes now instead of having to rip it out and redo it later.
If you’re not sure which type of window you need, or you need help with the installation guidelines, hit us up. We can walk you through the exact specs for your space, share installation manuals, and even connect you with certified installers who know fire rated windows inside and out. Don’t wait until you’re in the middle of a project to figure out you ordered the wrong window or messed up the install—reach out early, and we’ll make sure your space is safe.
References:
- NFPA 80: Standard for Fire Doors and Other Opening Protectives, National Fire Protection Association, 2021
- ASTM E119: Standard Test Methods for Fire Tests of Building Construction and Materials, ASTM International, 2020
- International Building Code (IBC) Section 707: Fire-Resistant Construction, International Code Council, 2021